Storage Rack 3D Printer Enclosure
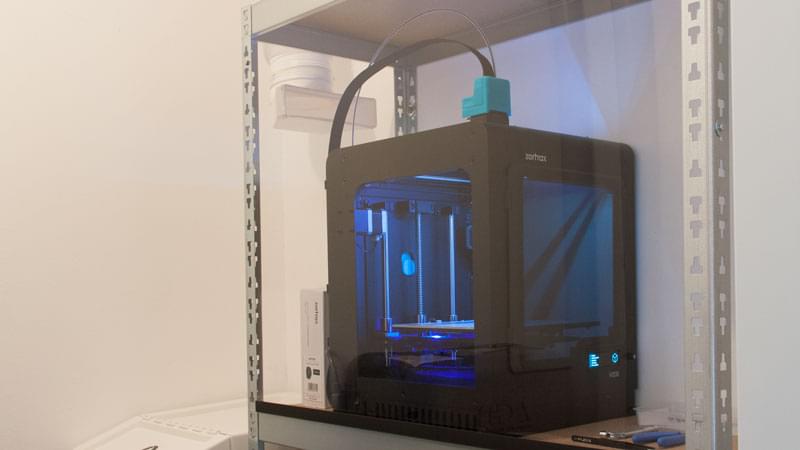
As you may know, I’m the proud owner of a Zortrax M200 3D printer. It’s been in my home office for some time, which I grew a bit uncomfortable with because of the noise and 3D printing fumes. To combat this, I converted part of a storage rack to a 3D printing enclosure.
I haven’t found anyone else who has used storage racks as a 3D printing enclosure. It’s fairly cheap (€135/$160) and easy to build - so here you go:
In this post I’ll share some details about the building process and provide enough information to build one yourself.
Goals
Get rid of 3D printing fumes
There’s a growing body of scientific evidence that being in the same room as your 3D printer may not be super healthy. I don’t really care whether this is something to worry about and don’t want to wait until the debate is over; better safe than sorry. For more info on 3D printing health risks, check out the end of this post.
Create a stable printing environment
Having a 3D printer in an open room is not ideal for the printing quality: the room temperature may fluctuate, there’s draft, dust, people and cats in the room, etcetera.
The development process
Step 1: Analysis
I’m not the first to enclose my 3D printer. These are some nice solutions that I’ve stumbled upon:
- Very popular Lack IKEA hack
- Cool 3D Printer Enclosure / Set-up / Maker Space
- 3D printing Tent - How to Build a Cheap Enclosure For Your 3D Printer / Printing with ABS
- Custom 3D printer cabinet
- Commercial enclosure with acrylic panels
Unfortunately none of the options above fully met my requirements, so I came up with the idea to enclose a storage rack.
Step 2: The idea
I started out with some simple requirements:
- Enough space to put a 3D printer & 1 roll of filament
- Stable surface for the 3D printer
- Option for ventilation, air filtration and airflow control
- Mainly built with ready-made parts (rules out DIY acrylic stuff and DIY furniture)
- I want to see the printer without opening the enlosure
- Preferably at a comfortable working height
- Cost-effective
- Fast assembly
Which eventually led to the idea that I may enclose a storage rack to house my 3D printer. And, what a coincidence, it turns out the storage rack was already there.
Step 3: Go shopping
I ordered my parts at Kunststofplatenshop.nl and Hornbach.
Dimensions of the parts vary for each storage rack so it’s best to get that first. I put the side panels inside the rack for easier assembly.
Big parts ~ €125 :
- A storage rack, duh. ~ €40-€60
- Side panels: 2x 3mm cast acrylic sheets. Cast sheets are easier to drill/cut without breaking. I made them 3mm to make them stiff enough for the ventilation parts. ~ 2x €20
- Front panel: 2mm acrylic sheet ~ €15
- Back panel: not needed if it’s fixed to the wall.
- Optional: ventilation parts ~ €20
Small parts ~ €10 :
- 2x Sticky neodymium magnets to keep the front panel secure - ordered at Supermagnete.de
- Plastic profile for the front panel
- Bolts, nuts & washers to secure the side panels
- Screws & washers to secure the bottom plate of the storage rack
- Plugs & screws to fix the storage rack to the wall
Total costs: €135 ($160)
Step 4: Putting it together
Fix the storage rack to the wall
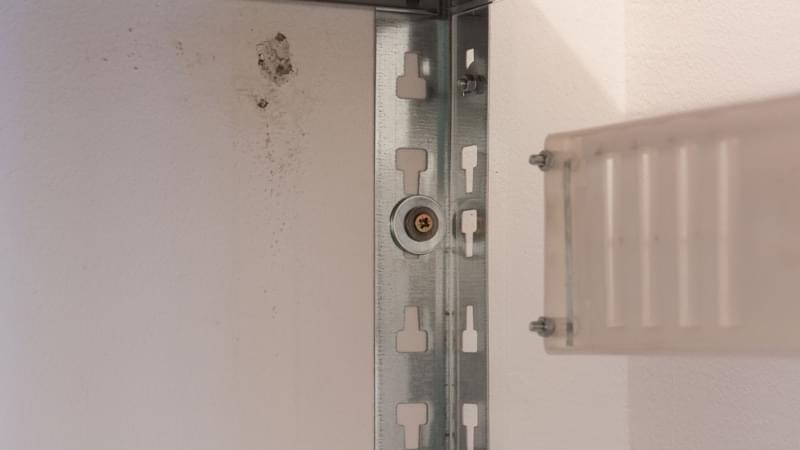
Your 3D printer will shake the entire rack if the rack isn’t stable enough. This will most likely also influence the quality of your 3D prints. I fixed it to the wall with 4 screws to be sure and to reduce the noise.
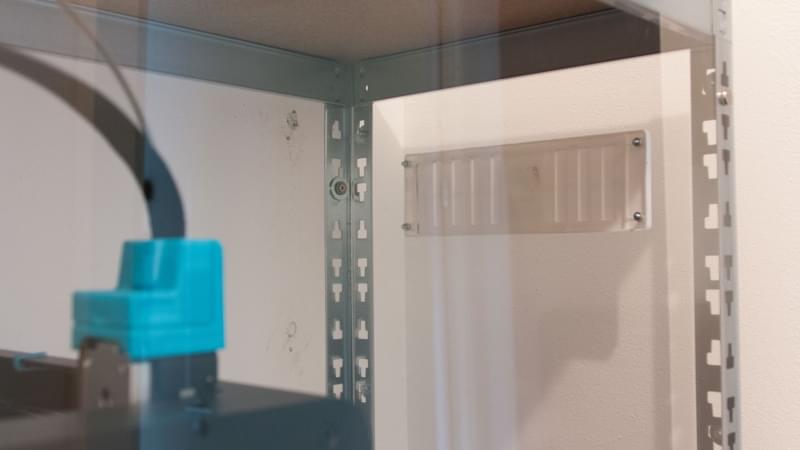
The acrylic panels
The front panel is the easiest part. This should be exactly the size of the storage rack so it closes all the gaps. It stands on a plastic corner profile and is fixed to the storage rack with 2 sticky magnets so it can easily be removed.

Initially I wanted to make sliding doors, but found that they’re not as airtight. Turns out it’s very convenient to be able to remove the entire front of the enclosure.
The side panels are fixed with the M3 bolts and some rings that cover the holes in the storage rack.
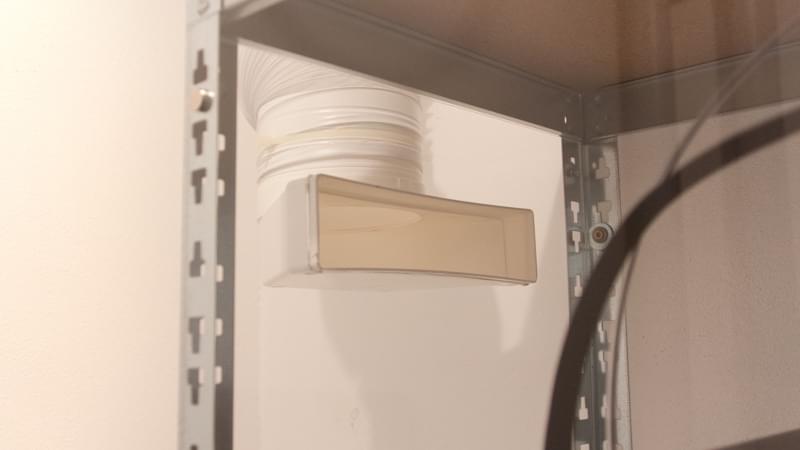
Ventilation holes
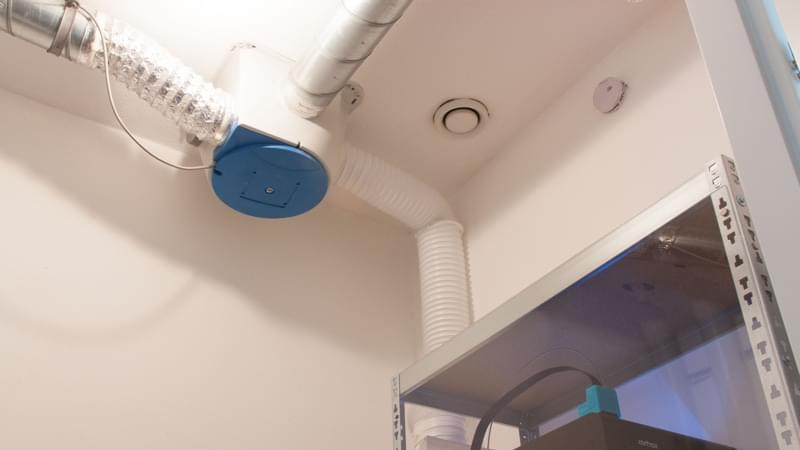
My goal was to put the storage rack in a closet and add ventilation and flow control to the enclosure. The home ventilation system is in the same closet, so I can easily connect it to ventilate the enclosure.
If you need to do some cutting/drilling/sawing, I would recommend to choose cast acrylic sheets over extruded ones.
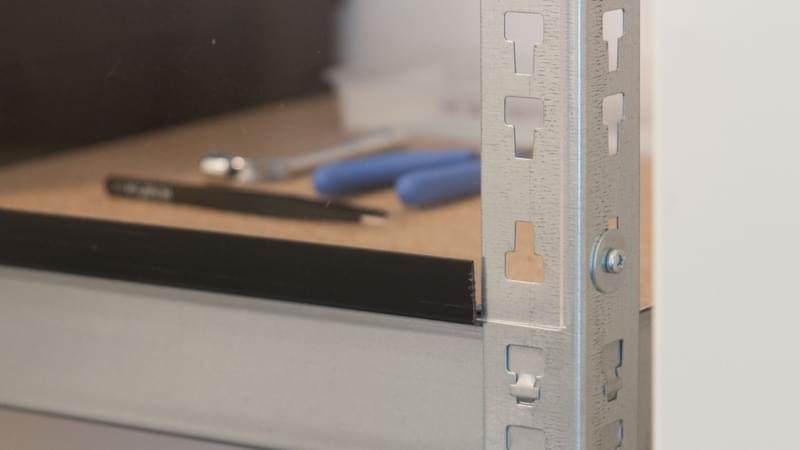
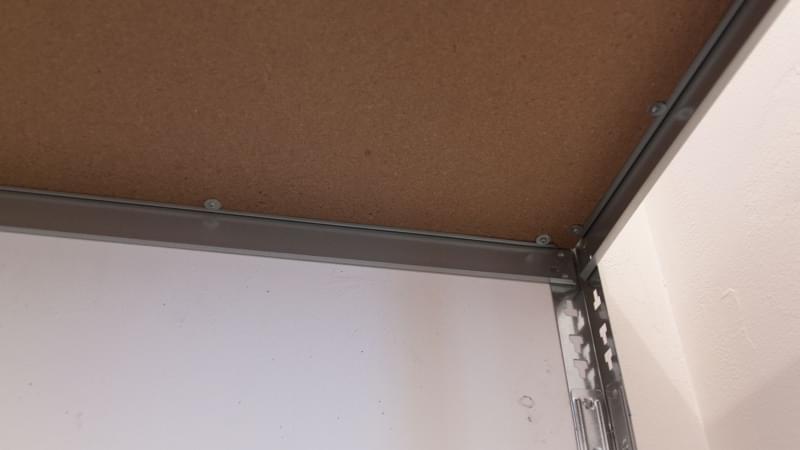
Stabilising the bottom plate
One thing I learned is that the bottom plate still moves a bit when printing. This produces some noise and may influence the 3D printing quality. To solve this, I’ve fixed the bottom plate with screws and washers as shown below.
Install a fire alarm (optional)
Although the risk of a 3D printer catching fire is minimal, it does run for multiple hours - unattended and out of sight. I felt a bit more comfortable installing a fire alarm above the rack, just in case.
Findings
- One of my main concerns was that adding ventilation might cause unwanted airflows that cause warping issues (especially with ABS). Thus far I haven’t encountered such problems, even with the ventilation on full power (about the same as an extractor hood).
- Another concern was heat buildup, but this isn’t an issue. Room temperature + 4 degrees is about as hot as it gets. Highest reading: 28 degrees Celcius.
- Enclosing the printer removes a lot of noise too! I can’t hear it printing in the closet, honestly.
- The smell of 3D printing is completely gone. If some of the fumes would still leak out of the enclosure, I assume you would definitely smell it in a closet.
- There hasn’t been any dust on my 3D printer since it’s in the enclosure. I assume the ventilation/air tightness is good enough to take care of that for me!
What’s next?
Now that I have a permanent and stable environment for my 3D printer, I’m thinking about:
- Monitoring the environment variables (temperature, humidity, air pressure) to debug the printing process.
- Adding a camera for print monitoring, timelapse photography & debugging. And for fun.
- Wall-mounted filament spools. This should make switching the spools a bit easier.
More information
Research on 3D Printing health risks:
- Azimi, Zhao, Pouzet, Crain & Stephens: Emissions of Ultrafine Particles and Volatile Organic Compounds from Commercially Available Desktop Three-Dimensional Printers with Multiple Filaments (2016)
- Azimi, Fazli & Stephens: Predicting Concentrations of Ultrafine Particles and Volatile Organic Compounds Resulting from Desktop 3D Printer Operation and the Impact of Potential Control Strategies (2017)
- Floyd, Wang & Regens: Fume emissions from a low-cost 3-D printer with various filaments (2017)